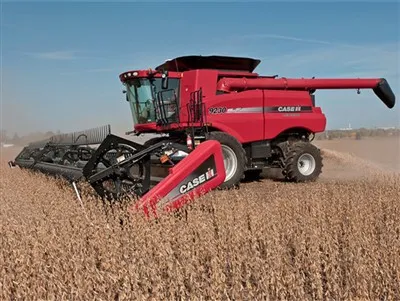
As a provider of small wheat harvesters, I understand the importance of proper maintenance to ensure the longevity and efficiency of these valuable machines. Cleaning a small wheat harvester after each use is a crucial step in its maintenance routine. This not only helps in preventing breakdowns but also enhances the overall performance of the harvester. In this blog, I will share some detailed steps on how to clean a small wheat harvester effectively.
Step 1: Preparation
Before you start cleaning the harvester, it is essential to take some safety precautions. First, make sure the harvester is turned off and the engine is completely cooled down. This will prevent any accidental starts or burns during the cleaning process. You should also wear appropriate protective gear, such as gloves, goggles, and a dust mask, to protect yourself from debris and chemicals.
Gather all the necessary cleaning tools and supplies. These may include a pressure washer, a soft - bristled brush, a bucket of soapy water, a hose, and a lubricant. Having everything ready in advance will make the cleaning process more efficient.
Step 2: Remove Loose Debris
Start by removing any loose debris, such as wheat straws, chaff, and dirt, from the exterior of the harvester. You can use a broom or a leaf blower to quickly get rid of the larger pieces. Pay special attention to the areas around the cutting blades, the feeder, and the grain tank. These areas tend to accumulate a lot of debris during the harvesting process.
Step 3: Clean the Cutting Blades
The cutting blades are one of the most critical parts of the small wheat harvester. Over time, they can become dull and clogged with wheat residue, which can affect their cutting performance. To clean the cutting blades, use a soft - bristled brush to remove any debris that is stuck to them. Then, soak a cloth in soapy water and wipe the blades gently. Make sure to remove all the dirt and grime from the edges of the blades.
After cleaning, inspect the blades for any signs of damage, such as nicks or chips. If you notice any damage, it is advisable to replace the blades as soon as possible to ensure the continued efficiency of the harvester. You can find high - quality replacement blades for our Small Wheat Harvester on our website.
Step 4: Clean the Feeder and Conveyor System
The feeder and conveyor system are responsible for transporting the wheat from the cutting area to the grain tank. These parts can get clogged with wheat straws and other debris, which can cause the harvester to malfunction. Use a pressure washer or a hose to clean the feeder and conveyor system thoroughly. Start from the top and work your way down, making sure to reach all the nooks and crannies.
If there are stubborn clogs, you can use a soft - bristled brush to loosen the debris. Be careful not to damage the conveyor belts or other moving parts while cleaning. After cleaning, lubricate the moving parts of the feeder and conveyor system according to the manufacturer's instructions. This will help to reduce friction and prevent premature wear and tear.
Step 5: Clean the Grain Tank
The grain tank is where the harvested wheat is stored. It is important to keep it clean to prevent the growth of mold and bacteria, which can contaminate the wheat. Empty the grain tank completely and remove any remaining wheat or debris. Then, use a pressure washer or a hose to clean the inside of the tank. You can also use a mild detergent to remove any stubborn stains.
After cleaning, dry the grain tank thoroughly to prevent rusting. You can use a clean cloth or a fan to speed up the drying process.
Step 6: Clean the Engine and Cooling System
The engine is the heart of the small wheat harvester, and it needs to be kept clean to operate efficiently. Start by removing any dirt and debris from the engine compartment using a brush or a compressed air gun. Be careful not to damage any of the sensitive components, such as the electrical wires or the fuel lines.
Next, clean the cooling system, including the radiator and the cooling fins. A clogged radiator can cause the engine to overheat, which can lead to serious damage. Use a radiator cleaner and a soft - bristled brush to clean the radiator fins. Then, flush the cooling system with clean water to remove any remaining debris.
Step 7: Lubrication
After cleaning, it is important to lubricate all the moving parts of the small wheat harvester. This includes the bearings, the chains, the gears, and the pivot points. Use a high - quality lubricant recommended by the manufacturer. Lubrication helps to reduce friction, prevent wear and tear, and extend the lifespan of the harvester.


Step 8: Final Inspection
Once you have completed the cleaning and lubrication process, conduct a final inspection of the small wheat harvester. Check all the parts for any signs of damage or wear. Make sure all the bolts and nuts are tightened properly. Test the harvester to ensure that it is functioning correctly.
Regular cleaning and maintenance of your small wheat harvester will not only keep it in good working condition but also save you money in the long run by reducing the need for costly repairs. If you are in the market for a reliable and efficient small wheat harvester, look no further than our Small Wheat Harvester. We also offer a range of other agricultural machinery, such as the Durable Rotary Tiller and the Corn Rapid Picking Machine.
If you have any questions about our products or need further advice on cleaning and maintaining your small wheat harvester, please feel free to contact us. We are always ready to assist you with your agricultural equipment needs and look forward to discussing potential procurement opportunities with you.
References
- Agricultural Machinery Maintenance Handbook
- Manufacturer's Manual for Small Wheat Harvesters